
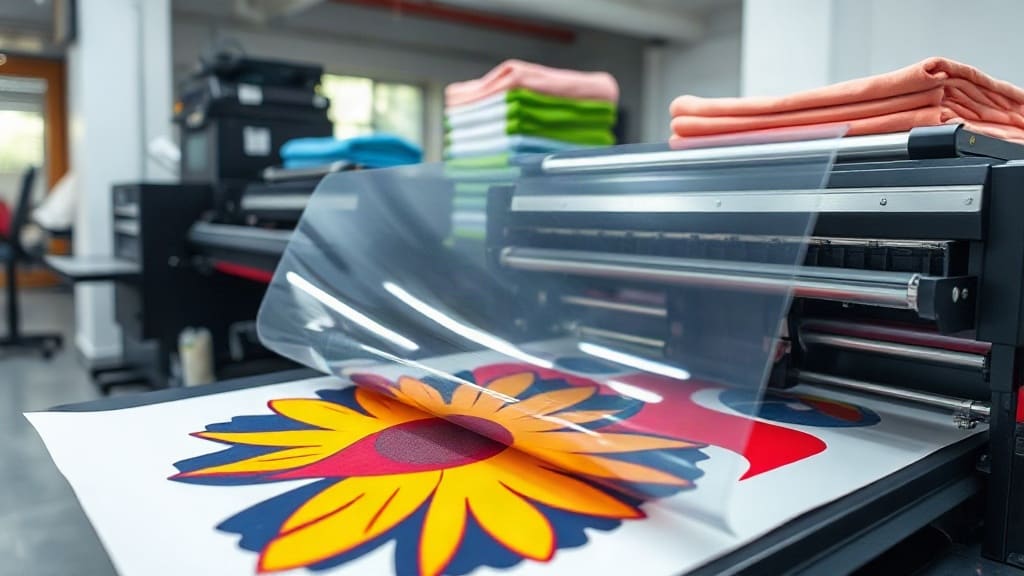
DTF (Direct-to-Film) printing has revolutionized the custom apparel industry. If you've ever wondered how those vibrant, detailed prints end up on t-shirts, hoodies, or even tote bags, this guide will walk you through the technology, the workflow, and the secrets to getting professional results.
Unlike traditional screen printing or DTG (Direct-to-Garment), DTF prints your design onto a special film, then transfers it to fabric using heat and adhesive powder. This method opens up a world of possibilities, especially for small businesses and print-on-demand sellers.
What is DTF Printing?
DTF stands for Direct-to-Film. It involves printing a design onto a PET film using a special inkjet printer and pigment inks, coating it with a hot-melt adhesive powder, and then curing that powder. The film is then placed on a garment and heat-pressed, transferring the design permanently.
The beauty of DTF lies in its versatility. You can print on cotton, polyester, blends, and even nylon without needing a pre-treatment. Colors pop, details stay sharp, and the print has a soft hand feel that rivals screen printing.
How DTF Printing Works: Step-by-Step
1. Design and Print
First, you prepare your artwork using graphic design software. Ensure it's at the right resolution (at least 300 DPI) and has proper color separation. Then, you print it onto a roll of PET film using a DTF printer that uses CMYK+W (cyan, magenta, yellow, black, and white) inks. The white ink acts as a base to make colors opaque on dark fabrics.
2. Apply Adhesive Powder
While the ink is still wet, you cover the printed film with a high-quality hot-melt adhesive powder. The powder sticks only to the wet ink. You'll use a shaker to evenly distribute it, and the excess is collected for reuse.
3. Cure the Powder
The film goes through a curing oven or heat source that melts the powder, creating a strong adhesive bond. If you're using a powder shaker with a built-in dryer, this step is seamless. Otherwise, you may need a separate conveyor dryer or heat press to cure the powder.
4. Transfer to Fabric
After cooling, place the film onto your garment with the printed side down. Apply heat and pressure using a heat press. Typically, you'll press at 160–170°C (320–340°F) for 10–15 seconds with medium to firm pressure.
5. Peel the Film
Once the film cools slightly, peel it away to reveal the transfer. The design should have fully adhered to the fabric, leaving a soft, stretchy print.
Key Advantages of DTF Over Other Methods
- Versatility: Works on almost any fabric, including 100% cotton, polyester blends, denim, and even leather.
- No Pre-Treatment: Unlike DTG, you don't need to pre-treat garments, saving time and money.
- Vibrant Colors: The white ink base ensures colors pop on dark backgrounds.
- Durability: Prints withstand multiple washes and stretching without cracking.
- Cost-Effective for Small Runs: No screens or setup fees, making it ideal for one-off orders.
- Soft Hand Feel: The film transfer results in a smooth, flexible print that doesn't feel heavy.
Essential Equipment for DTF Printing
To start a DTF operation, you'll need a few key pieces of equipment. Here's a checklist to get you going:
- DTF Printer: A dedicated printer with CMYK+W ink system. Many models are based on Epson XP or L1800.
- PET Film: High-quality, tear-resistant film specifically designed for DTF.
- Hot-Melt Adhesive Powder: Usually a fine powder that activates under heat.
- Powder Shaker/Drying Oven: Some systems combine shaking and drying in one machine.
- Heat Press: A clamshell or swing-away press capable of reaching 200°C.
- Rip Software (optional): For color management and print setup.
DTF vs. DTG: Which One is Right for You?
Choosing between DTF and DTG depends on your needs. DTG (Direct-to-Garment) prints directly onto fabric using water-based inks, but it requires pre-treatment for cotton and can't handle polyester well. DTF, on the other hand, is more versatile and doesn't need pre-treatment.
If you're looking to print on a variety of fabrics, offer quick turnarounds, and avoid the hassle of pre-treatment, DTF is the winner. However, DTG might have an edge when it comes to ultra-soft prints on 100% cotton, but DTF comes close.
Tips for Perfect DTF Transfers
Here are some practical tips to ensure your DTF prints come out flawless every time:
- Calibrate your printer: Regularly check and align your printheads to ensure sharp, consistent output.
- Use quality materials: Cheap film or powder can lead to poor adhesion or cracking. Invest in reputable brands.
- Mind the humidity: Excess moisture in the air can affect powder sticking. Keep your workspace dry.
- Test on scrap fabric: Before a big run, do a test press to adjust temperature and pressure.
- Properly store your film: Keep it in a cool, dry place away from sunlight to prevent ink drying or film warping.
Common Mistakes to Avoid
- Overheating: Too high a temperature can scorch the film or cause the powder to burn, leading to poor adhesion.
- Under-curing: If the powder isn't fully cured, it won't melt properly during transfer, causing peeling.
- Incorrect pressure: Too little pressure leaves gaps, while too much can crush the fabric.
- Ignoring white ink: Always ensure your white base is opaque enough for dark fabrics.
- Skipping test prints: Always test a sample to avoid wasting blanks.
Frequently Asked Questions (FAQ)
How long does a DTF transfer last?
When applied correctly, a DTF print can withstand over 100 washes without significant fading or cracking. The durability depends on the quality of your materials and the heat press settings. Always follow recommended parameters for best results.
Can I use DTF on dark fabrics?
Absolutely, one of the main advantages of DTF is its ability to print on dark colors. The white ink base provides an opaque layer that makes the design pop on any dark garment. Just ensure your printer's white ink is well-maintained and the film is properly coated.
What is the minimum quantity for DTF?
There is no minimum, which makes DTF perfect for one-off orders or samples. Unlike screen printing that requires setup, DTF allows you to print a single item economically. You can even print multiple designs on one film and cut them out.
Is DTF printing expensive to start?
The initial investment can be moderate. A quality DTF printer, film, powder, and heat press might cost between $2,000 and $5,000. However, the ongoing cost per print is low, and you can quickly recoup your investment with small runs and custom orders.
Do I need a special heat press for DTF?
No, a standard heat press will work, but you need one that can reach at least 170°C and apply even pressure. Some manufacturers recommend a press with adjustable pressure settings to achieve the perfect transfer.
Conclusion
DTF printing is a game-changer for anyone in the custom apparel industry. Its flexibility, ease of use, and vibrant results make it an attractive option for small businesses, print shops, and hobbyists alike. By understanding the process and investing in quality equipment, you can produce professional-grade transfers that your customers will love.
So, whether you're just starting or looking to expand your services, give DTF a try. It might just become your go-to printing method.